Classifier
Use the Classifier tool to identify and classify the objects in your images. Once trained, the tool returns a predicted class and a confidence score for unseen images.
The Classifier tool can perform tasks such as:
-
Classifying objects or scenes
-
Separating different classes based on a collection of labeled images
-
Identifying products based on their packaging
-
Classifying the quality of welding seams
-
Separating acceptable or unacceptable anomalies
To set up the Classifier tool:
-
ROI The Region of Interest (ROI) is the area of the image where the vision tool operates.: Set the ROI to create Views The area of the image that the device operates on is called a view. A view can be the entire image, a user-defined rectangular area of the image, or the output of a tool, depending on the tool. from your images.
-
Label: Create classes with the Add button. Label your Views with the classes.
-
Train: Select the Training Mode you want to train. Set training parameters. Assign roles manually or automatically to Views to determine how the Views are processed.
-
Process: Click Process All.
When processing finishes, the results panel shows detailed statistics about the results of the tool.
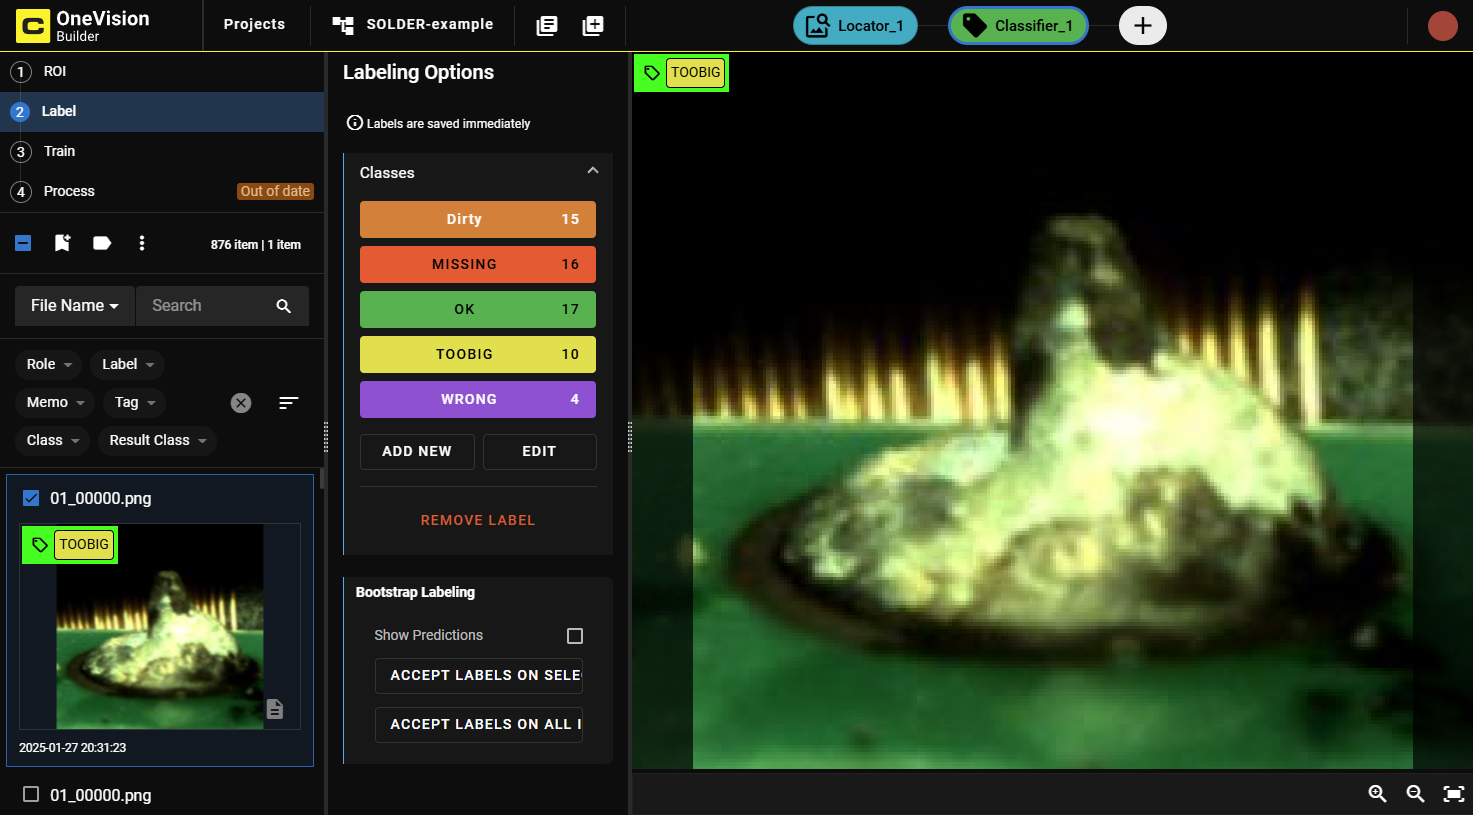
In the Label step, create your classes and assign them to views:
-
Create classes with the Add button.
-
Label your views. You can label several images at the same time by selecting them. To label a view as a certain class:
-
Select the view in the browser.
-
Click the corresponding label in the LabelingLabeling is the process of marking features or defects in images, or categorizing the images into classes. Labeling is crucial for training Deep Learning Lite and Deep Learning Standard tools because the labels serve as training material to guide the tools how to function correctly. Options.
Labeled views have a colored graphical mark in the upper left corner that shows the assigned class.
-
After the Label step, proceed to the Train step to train the model.
-
Select a Training Mode:
-
Deep Learning Lite - Few Sample (Default): Optimized for standardized objects. Requires only a few images to train.
-
Deep Learning Lite - Accurate: Optimized for rotated and scaled objects. Requires more images to train.
-
Adjust the training parameters as needed.
 Training Parameters
Training Parameter Description Epochs Note: Not applicable for Deep Learning Lite - Few Sample.Specifies the number of optimization iterations done during training. Use a lower value when your application has limited complexity, or when creating a lower quality model for testing different parameter settings.
The tools typically need to see the training data about 40 times, which is the default setting. This setting is sufficient for most standard applications.
If you use fewer epochs, the neural network modelEach AI tool is a neural network model. A neural network model mimics the way biological neurons work in the human brain. The neural network model consists of interconnected layers of artifical neurons, called nodes, and they have multiple layers. Neural network models excel at tasks like image classification and pattern recognition. can get stuck in learning, or become unable to accurately solve the problem. However, if you use too many epochs, you risk overfittingThe more training epochs that are used for training, the more accurately the network model responds to the training set images. After a certain amount of training, however, the improved performance of the network model on the training data is accompanied by poorer performance on unseen images..
Note: Temporarily reducing the Epochs parameter also makes the training time shorter.Optimize If you check this box, the image sizes are optimized for the training process.
Model Health Folds Note: Not applicable for Deep Learning Lite - Few Sample.Number of folds to use for cross-validation.
Resize Parameters Feature Size specifies the typical feature diameter in pixels. Adjust this setting to achieve a more accurate result by ignoring smaller image features than the specified Feature Size. The Feature Size approximates the size of a typical feature that is needed for a good classification. For example, If the Feature Size is set to 16 pixels, any image feature smaller than 16 pixels is ignored for classification.
Feature Size strongly influences processing time. A Feature Size of 100 is 100 times faster than a size of 10, while a Feature Size less than 8 usually does not yield good results. When setting the Feature Size, consider the equation in regards to processing time (Ptime):
Ptime ~ F2
Resize Parameter Options determines which resize policy is applied. Default changes the size of the image to the optimal size for the tool and is therefore recommended. Feature Size allows manual adjustment, mainly for acceleration. However, this can degrade the quality of the result.
-
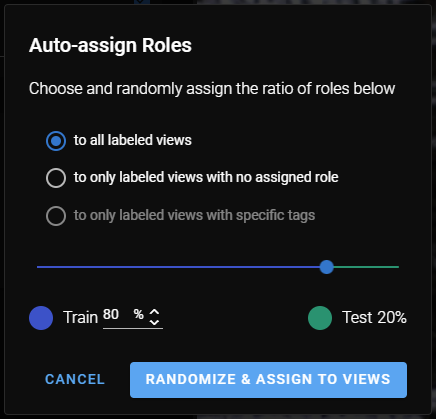
To auto-assign roles to images, click Auto-Assign Roles. A pop-up window provides you with options for how to assign roles:
See the Label section for more information.
After clicking Process All in the Process step, the tool provides the following in the results panel:
-
Detailed statistics about the performance of the tool in the panel on the right side of the window.
-
Graphical markings in the upper left corner of the views:
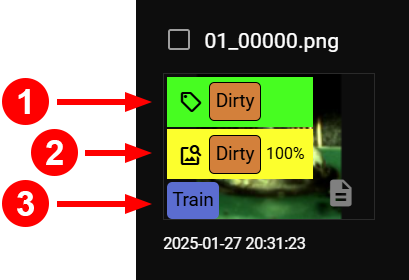
Number Name Description 1 Assigned Label The label you set for the view in the label step. 2 Prediction Label The label prediction after the process is complete. The percentage indicates the level of confidence the tool has in its predicted label. 3 Role The role that you either manually assigned or auto-assigned. For information on role assignments, see Train.
Review the statistics and metrics that OneVision returns in the right-side panel:
-
If the performance of the tool is optimal based on the returned statistics, you are ready with the training.
-
If the performance is not satisfying, you can adjust your labelingLabeling is the process of marking features or defects in images, or categorizing the images into classes. Labeling is crucial for training Deep Learning Lite and Deep Learning Standard tools because the labels serve as training material to guide the tools how to function correctly., refine the parameter settings, or provide more labeled data and retrain the tool.
Information about processing time and the confidence score of the predicted classes.

|
|
|||||||||||||||||
| Section | Description | ||||||||||||||||
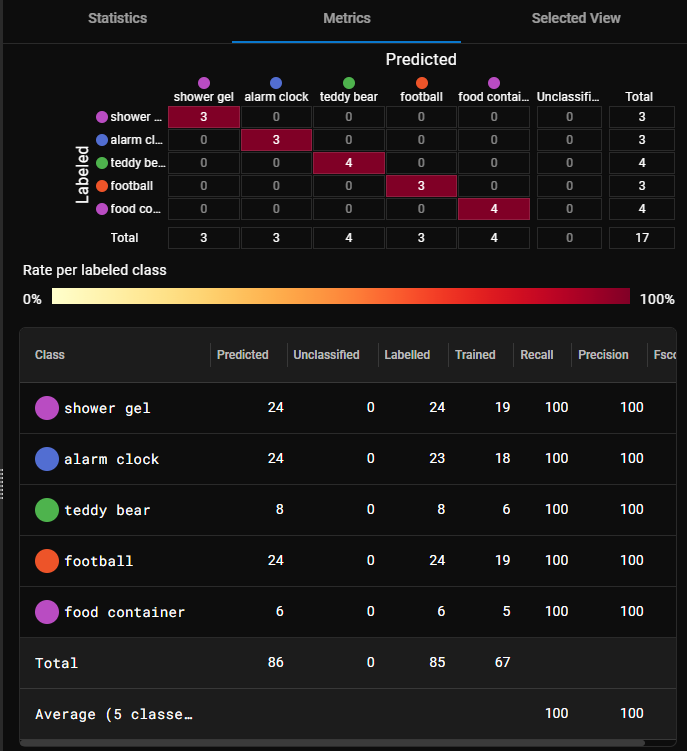
| Confusion Matrix |
The confusion matrix is a visual representation of the labels matched against the predictions of the tool.
|
||||||||||||||||
| Results Statistics |
The table lists the classes and information about each one in the corresponding columns.
|
||||||||||||||||


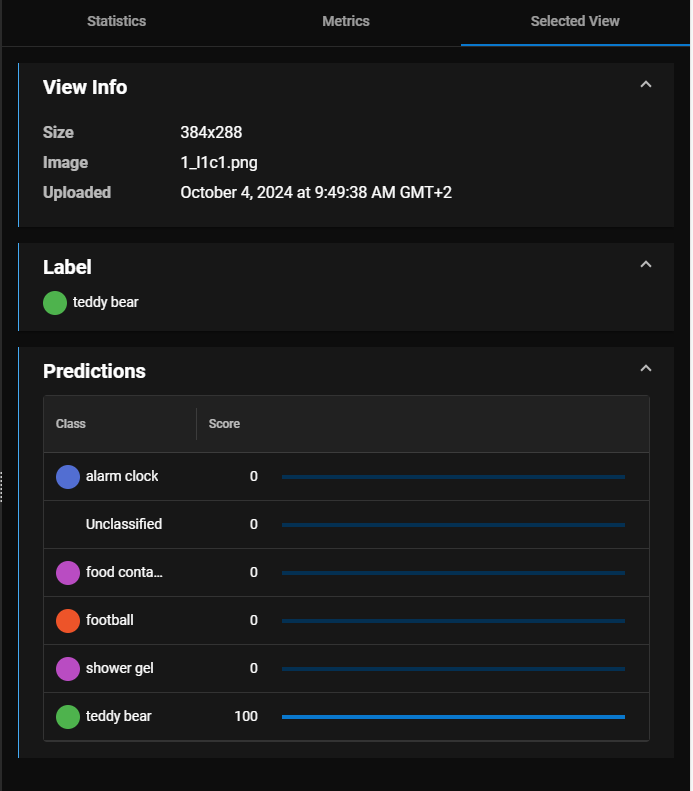
Detailed information about the selected view only, including image data, the assigned label, and a breakdown of the predicted classes.
For information on how to read the tables and diagrams, see Metrics and Statistics.
You can use the Classifier tool flexibly as part of a toolchainContains a group of tools and the sequence of execution for each tool.. For example:
-
The Classifier tool can pass images of a class to a Segmenter tool for further inspection.
-
The Classifier tool can pass images of a class to a Locator tool to count features.
-
The Classifier tool can take images from a Segmenter tool to classify the types of defects.